

Injection molding defects usually come from five connected areas: part design, resin behavior, mold construction, process settings, and cooling balance. The practical solution is not a single machine adjustment; it is an early DFM review, precise injection mold design, stable plastic injection molding parameters, and disciplined inspection before mass production. When these controls work together, teams can reduce sink marks, warpage, weld lines, flash, short shots, burn marks, and internal voids before they become costly production problems.
Why Injection Molding Defects Happen
Most injection molding defects appear when molten plastic cannot fill, pack, cool, or release from the mold in a controlled way. A wall that is too thick may shrink unevenly, a thin flow path may freeze before the cavity is full, and a poorly vented end-of-fill area may trap gas until the surface burns.
Maidder treats defect prevention as an engineering sequence that begins with product design and engineering, then moves into tooling, molding, and validation. That matters because many visible defects are only symptoms of earlier decisions made around ribs, bosses, wall transitions, gate position, resin selection, and cooling layout.
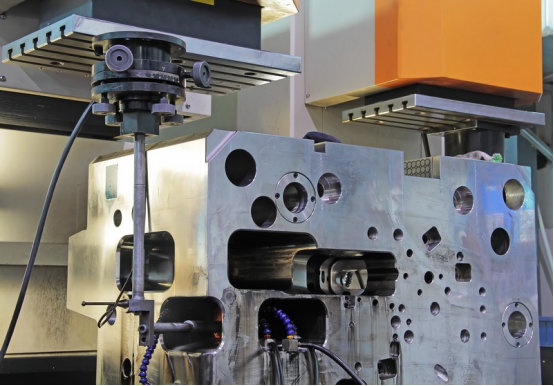
Common Injection Molding Defects in Plastic Parts
Sink Marks, Warpage, and Internal Voids
Sink marks form when thick sections cool more slowly than surrounding walls and continue to shrink after the skin has hardened. They often appear near ribs, bosses, screw posts, or heavy transitions where packing pressure cannot fully compensate for volume loss.
Warpage is a dimensional defect caused by uneven shrinkage and residual stress. If one side of a part cools faster than another, the molded part may bend, twist, or lose flatness after ejection. Internal voids are related to the same packing and cooling challenge, especially in thick posts or heavy wall areas where a vacuum pocket can form inside the part.
Flash, Short Shots, and Weld Lines
Flash happens when molten plastic escapes through a parting line, insert gap, or worn mold surface. It may point to excessive injection pressure, insufficient clamp force, overly fluid material, or a mold surface that needs cleaning or repair.
A short shot is the opposite problem: the melt does not completely fill the cavity. Low injection pressure, slow injection speed, small gates, poor venting, or a long flow distance can all leave thin features incomplete. Weld lines form where two melt fronts meet after flowing around holes, ribs, or inserts; if the melt is too cool or trapped air remains at the meeting point, the line can affect both appearance and strength.
Silver Streaks, Burn Marks, and Black Spots
Silver streaks often indicate moisture or volatile gas in the resin. Hygroscopic materials need controlled drying because steam can stretch along the melt flow and leave bright, threadlike marks on the surface.
Burn marks usually appear near the end of fill or in dead corners where trapped air is compressed and overheated. Black spots may come from degraded resin, carbonized material in the barrel, contamination in the feed system, or foreign material inside the mold. These defects require process control, material handling, and mold maintenance rather than cosmetic rework after molding.
DFM Injection Molding Checks That Reduce Defects
DFM injection molding is the stage where many defects can be prevented with small, practical design changes. Engineers review wall thickness, draft angle, rib-to-wall ratios, boss design, shutoffs, undercuts, texture requirements, material shrinkage, and expected flow length before steel is cut.
Uniform walls reduce sink marks and warpage, while correct draft angles reduce ejection stress and whitening. Ribs should strengthen the part without creating heavy material build-up, and bosses should be supported without becoming thick heat traps. Good DFM also checks whether the chosen plastic can fill thin features without excessive pressure.
Moldflow analysis is useful when a part has long flow paths, cosmetic surfaces, multiple gates, or complex structural features. It helps predict weld line location, air traps, pressure demand, cooling imbalance, and shrinkage behavior before the project moves into expensive tooling changes.
Mold Choices That Improve Part Quality
Tooling quality has a direct effect on injection molding quality control. Maidder's in-house tooling capability includes high-speed CNC machining for milling and spark erosion, with tooling options from aluminium single-impression prototype tools through P20 and fully hardened multi-cavity tools with valve gate hot runner systems.
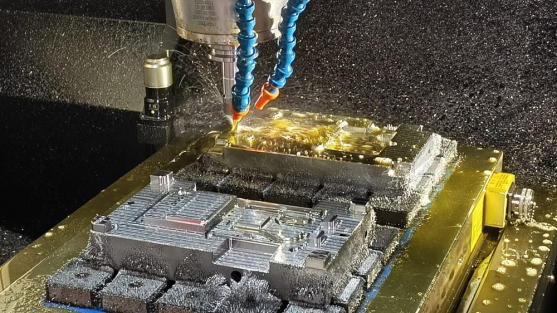
A well-designed gate supports balanced filling and effective packing, while a suitable runner system reduces pressure loss and material hesitation. Venting must be placed where air actually collects, especially near weld lines, end-of-fill zones, ribs, and deep features. Cooling channels should keep mold temperature consistent across thick and thin areas so shrinkage remains predictable.
Multi-cavity tools add another layer of discipline because each cavity must fill and cool in a similar way. Hot runner and valve gate systems can help with flow control in appropriate projects, but they also require careful thermal balance and maintenance. The best injection mold design is not simply complex; it is stable, serviceable, and matched to the molded part's production volume.
Process Settings That Stabilize Plastic Injection Molding
Once the mold is ready, the molding window must be proven. Barrel temperature, mold temperature, injection speed, holding pressure, holding time, cooling time, screw recovery, and back pressure all influence defect risk. A change in one setting can improve one defect while creating another, so process adjustment should follow the defect mechanism rather than guesswork.
For example, sink marks may improve with higher holding pressure and longer holding time, but excessive pressure may increase stress marks or flash. Short shots may improve with higher injection speed and temperature, but overly aggressive filling can worsen burn marks if venting is poor. Stable production depends on understanding these trade-offs.
Quality Control That Catches Problems Early
Inspection should confirm both visible quality and dimensional stability. Maidder's quality assurance resources include CMM measurement, optical measuring equipment, and Minitab software for dimensional and statistical analysis, supporting design, manufacturing, and qualification requirements.
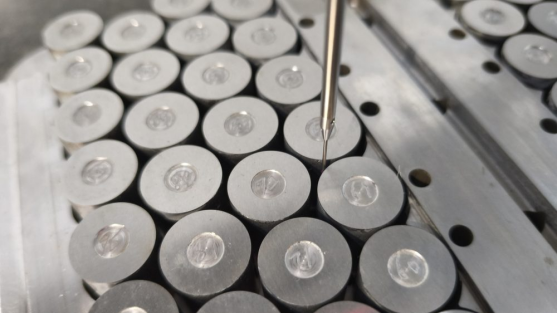
Quality control is most valuable when it is connected to process learning. First-piece checks, dimensional studies, in-process inspection, and functional review help engineers understand whether a defect is isolated, process-related, or design-related. Methods such as APQP, MSA, FMEA, and PPAP are useful because they create a structured path from risk identification to production approval.
Where Maidder Fits in Defect Prevention
Maidder is a practical fit for projects where defect prevention must connect design, tooling, molding, assembly, and quality validation. Its molding capability covers insert molding, two shot molding, foaming and injection molding, and production from low volume through high volume with robots and automation. The material range includes PC, ABS, PP, TPE, POM, Nylon, and filled or blended materials, giving engineering teams flexibility across cosmetic, structural, and assembly-focused plastic parts.
For OEM and ODM plastic products, the important value is continuity. When the same engineering logic carries from DFM to tooling trials and production inspection, the team can find root causes faster and avoid treating every defect as a separate surprise. That is how injection molding defects become manageable engineering risks rather than recurring production delays.
Conclusion
Injection molding defects are best solved before they appear on the production floor. Strong DFM, precise tooling, controlled molding parameters, proper material preparation, and measurable quality control all work together to create better plastic parts with fewer cosmetic, structural, and dimensional risks.
For projects that need design review, tooling, molding, assembly, and validation under one engineering workflow, Maidder offers a grounded path from concept to stable production.
Connect Maidder to discuss how early engineering support can reduce molding risks in your next plastic product.
FAQ
Q: What are the most common injection molding defects?
A: Common defects include sink marks, flash, short shots, warpage, weld lines, silver streaks, burn marks, black spots, internal voids, and stress whitening. Each defect has a different root cause, so the correction should match the mechanism behind the problem rather than relying on one general process adjustment.
Q: How does DFM reduce injection molding defects?
A: DFM checks the wall thickness, ribs, bosses, draft angles, gate locations, flow of material, and cooling problems prior to tooling. This helps improve the molding process early on to avoid sink marks, warpage, weld lines, short shots, and ejection problems later on.
Q: Why do sink marks and warpage often appear together?
A: Both of these are associated with unequal contraction. The thicker portions take time to cool and contract more compared to the thinner regions, leading to creation of indentations on the surface or deformation of the entire piece. Wall balancing, packing, cooling, and use of better resins can minimize such issues.
Q: What should project teams check in an injection molding partner?
A: Project teams should look for engineering review, mold design capability, stable molding process control, inspection equipment, material experience, and assembly support when needed. A partner that connects these stages can identify defect risks earlier and manage production quality more consistently.
