
Ultrasonic welding for plastic parts joins compatible thermoplastic components by applying controlled high-frequency vibration at a designed joint. The result depends on more than the welding machine: part material, joint geometry, alignment, fixture support, energy transfer, and inspection must work together. Maidder offers ultrasonic welding as part of its post-molding assembly service, allowing molded components to move toward a finished plastic product in a connected workflow.
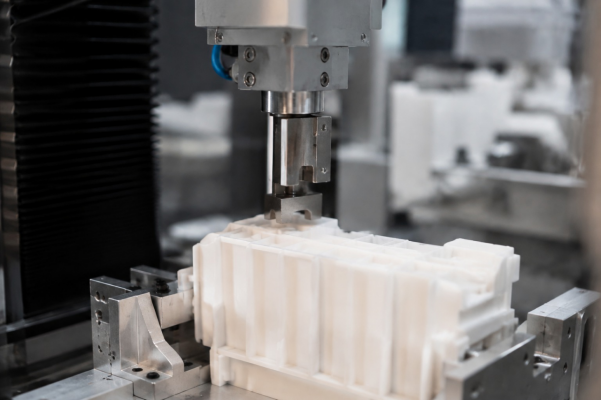
Start with the Joint, Not the Equipment
A reliable ultrasonic welding process begins in the plastic part design. The joint must give vibration a controlled path, keep the two components aligned, and concentrate heat where fusion is intended. If the parts are thin, uneven, poorly supported, or contaminated at the interface, changing machine settings may not solve the underlying problem.
The design brief should identify the weld path, visible surfaces, internal features, sealing needs, load direction, and the way the finished assembly will be handled. This is especially important for plastic housings, where a joint may need to protect internal electronics while remaining visually clean.
How Ultrasonic Welding Works for Plastic Parts
During welding, one component is supported in a fixture while a horn applies pressure and vibration to the joint area. The vibration creates localized heat at the contact interface, allowing compatible thermoplastic surfaces to soften and form a bond as pressure is maintained. After the vibration stops, the assembly needs enough hold time to stabilize before removal.
The exact machine settings depend on the materials, geometry, joint design, and required result.
Material compatibility matters
Ultrasonic welding works best when the two mating materials can form a stable thermoplastic joint under the selected process conditions. Different resins may soften at different temperatures or respond differently to vibration, which can create a weak interface, surface marking, or inconsistent energy transfer.
The material decision should therefore be linked to assembly from the beginning. Maidder supports materials such as PC, ABS, PP, TPE, POM, Nylon, filled, and blended materials, but the suitability of a pair still depends on the specific grade, part geometry, joint design, and required function.
Design Plastic Parts for Ultrasonic Welding
Create a defined energy path
A weld joint design normally includes a controlled contact feature that focuses vibration and heat at the intended interface. The feature should be continuous where a seal is needed and interrupted only where the function or venting strategy requires it. Broad, uncontrolled contact can spread energy and make the weld less predictable.
Keep the joint away from delicate cosmetic surfaces when possible. If the weld line must be visible, define an acceptable witness mark and inspect it on a representative sample. A small change in wall thickness, rib location, or joint height can affect both appearance and the way the horn transfers force.
Support thin walls and critical features
The fixture must support the part close to the weld path without distorting it. Unsupported walls can flex under pressure, while nearby ribs, bosses, inserts, or electronic features can receive unwanted vibration. The part and fixture should be reviewed as one mechanical system before production trials.
For housings, consider screw bosses, snap features, lenses, seals, labels, and internal boards during joint development. A good weld may still be a poor assembly result if the process damages a nearby feature or makes later service impossible.
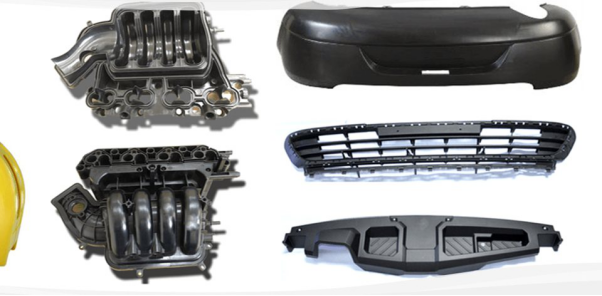
Control Horn and Fixture Design
Horn and fixture design determine how consistently energy reaches the joint. The horn face should contact the intended area, while the fixture should prevent movement and distribute support without marking the finished part. Their geometry must follow the part's shape rather than treating every assembly as a flat pressing operation.
Alignment is equally important. Locating features, nest surfaces, pins, and datum references can help place the upper and lower components in the same position every cycle. When a part has several weld paths or a large perimeter, the design should consider how force is distributed across the complete assembly.
Build the Ultrasonic Welding Process in Stages
The development sequence should move from part review to joint definition, fixture concept, trial welding, inspection, and process release. Early samples should be sectioned or otherwise examined when the internal bond cannot be judged from appearance alone. Record the conditions that produce an acceptable result, including the material batch, component fit, fixture, and machine program.
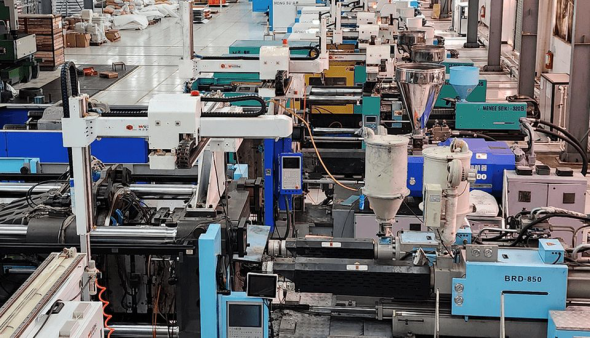
Process development is also a chance to find upstream molding issues. Flash, short shots, warpage, sink marks, contamination, and dimensional drift can change the weld interface. Stable plastic parts assembly depends on the molding process delivering repeatable geometry before the ultrasonic station receives the components.
Use Inspection That Matches the Joint's Function
Visual inspection can identify flash, burn marks, misalignment, surface damage, incomplete collapse, and inconsistent witness lines. Functional inspection should go further when the joint provides sealing, structural support, tamper evidence, or protection for internal components. The acceptance method should reflect what the finished assembly must withstand.
A practical quality plan may combine dimensional checks, appearance limits, leak or functional checks where applicable, destructive sample evaluation, and monitoring of process signals. Do not assign a strength number unless it has been established for the actual product. The important principle is to connect each check to a realistic failure mode.
Ultrasonic Welding Compared with Other Assembly Methods
Ultrasonic welding can reduce the need for screws, adhesives, or separate fasteners when the parts and joint are suitable. It may support a clean exterior, a repeatable cycle, and a compact assembly, while avoiding adhesive cure time. However, it also requires compatible thermoplastics, purpose-designed joint geometry, specialized tooling, and controlled alignment.
When deciding when to use ultrasonic welding instead of mechanical fastening, consider serviceability, joint visibility, material pairing, sealing, expected loads, production volume, and whether the assembly may need to be opened later. Screws or clips may remain preferable for repairable products, while welding may suit a sealed or tamper-resistant housing.
Connect Welding with Maidder's Molding Workflow
Maidder's molding service includes assembly, packing, and ultrasonic welding, alongside options such as insert molding, two-shot molding, foaming injection, automation, and production from low volume to high volume. This makes the post-molding operation part of the manufacturing conversation rather than an isolated finishing step.
For an OEM product, the most useful handoff includes the approved part drawings, resin and color requirements, weld-joint geometry, fixture datum scheme, cosmetic standard, functional checks, packing method, and change-control process. Keeping these items connected helps engineering teams trace an assembly issue back to the correct stage. Maidder also discusses the tooling and material considerations behind insert molding: Insert Molding Process for Plastic Parts.
Conclusion
Ultrasonic welding for plastic parts is most reliable when joint design, material compatibility, molding stability, fixture support, and inspection are developed together. The process can create a clean and repeatable plastic housing assembly, but its success is designed into the components before the welding station. Please contact us to connect your next molded-part assembly plan with Maidder's molding and post-molding services.
FAQ
Q: How does ultrasonic welding work for plastic parts?
A: The fixture holds the components, while the horn provides pressure and ultrasonic vibrations to the pre-established joint. The heat generated melts the surfaces that have been chosen because of their compatibility with thermoplastics. Pressure aids in bonding through interface stabilization. The process parameters vary depending on resin, shape, joint, tooling, and functionality.
Q: Can ultrasonic welding be used for plastic housings?
A: Yes, ultrasonic welding may be an appropriate joining method for plastic housings if material compatibility and a joint design that allows controlled energy transfer are ensured. Moreover, it is important to consider alignment, support, feature protection, and surface appearance or seal requirements for a housing. Serviceability must be taken into account before selecting a permanent joint type.
Q: What causes inconsistent ultrasonic welds?
A: The most common causes for this problem may include material differences, part distortion from molding, contamination, misalignment, fixture support, joint variability, and changes in machine settings. Check both the parts to be molded and the welding machine. A process change will only prove useful if the conditions remain constant.
Q: Does Maidder provide ultrasonic welding after injection molding?
A: Maidder offers assembly, packing, and ultrasonic welding as part of its molding service. The public service description does not promise a fixed machine specification or universal weld strength. Each assembly should be developed around its actual materials, joint geometry, fixture, inspection method, and functional requirements.
